Month: April 2015

Fields of Poppies

They shall grow not old, as we that are left grow old;
Age shall not weary them, nor the years condemn.
At the going down of the sun and in the morning
We will remember them.

Lest we forget.

This week, during our workshop, we took a little time to reflect on the up and coming ANZAC centenary and what this significant history means to our country and our community today.

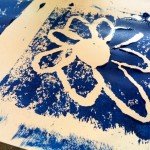
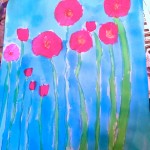
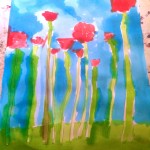
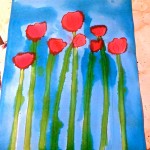
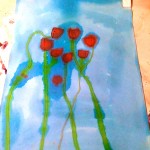
We painted simple poppy fields with water colour and I encouraged each artist to include some meaning in their work. For most of them, the meaning came with the number of poppies they painted. Some painted one for each fallen soldier from within their extended family, while others painted one for every decade leading up to the centenary. We also explore the concept of closed/budding and open/blooming poppies and how we could incorporate this into the piece with significance.

Water colour can be quite a challenging medium, in that you need to ensure you have your brush loaded with just the right amount of paint, otherwise once on the paper, the paint can get away from you and run into parts of your picture you weren’t intending it to go. There’s also the ‘bleeding’ factor to contend with, as colours can tend to meld together, creating an entirely new colour. We do quite a bit of water colour work, so the children are well versed in this, but with this activity, some of them chose to paint the background first and then paint the poppies to see what effect they would get. One comment was that in some places, it looked like it was “Tye died”. Rad!

Beautifully thought out pieces.

:) xx

IMG_9575

Easter Lino Cuts


We finally did lino cuts! I’ve wanted to do them for soooo long, but I was always very weary because, you know…. Sharp implements + children = !!!!!

But something about Easter made me feel brave (maybe it was all the chocolate….?) and so, we went for it. We kept our designs simple as this was our first experience and our intention was to get a feel for the tools, the lino and the concept of positive and negative space and how this transfers into print.

We talked about how the print comes out as the reverse/opposite of what you carve and how that affects any text/words used. I did advise eveyone to keep their design to images only and they did. Except for one. There’s always one – and I LOVE that! Art is about pushing boundaries and though you might be given advice or feedback, ultimately, it’s your decision what you choose to do in YOUR creation and in my opinion, when it comes to art, you can never be wrong.

I was very thorough with my safety briefing, making sure each artist knew the correct way to handle the lino cut tools and to always, ALWAYS carve AWAY from themselves and to always, ALWAYS keep their supporting hand BEHIND the sharp lino cut tools.

Sadly, we did end up with a few scrapes and jabs. We finished the lesson 3 from 3, a 50% success rate (or failure rate, depending on whether you see the glass half full or half empty).

For our first attempt, I’m pretty chuffed!

:) xx

IMG_9563

Upside Down Upcycling

Upcycling: The process of using waste materials or otherwise obsolete items to create new functional items, saving landfill.

Upcycling is one of my all time favourite things. Ever! Even as a youngster, I was always creating new from old. My specialty was clothing. I used to spend all my weekends fossicking through Op-Shops, looking for little gems to take home and alter into amazing works or wearable art! It’s still a passion, but not something I get much time to indulge these days.

Last year I introduced this concept to the Dabble Art crew and they fell in love with it too. So much so that they begged for a repeat. In our first workshop, we made single tier cake stands from old dinner plates, teacups, mugs and glasses. The results were off the charts and the kids were thrilled with the idea that the uses for this cool creation were unlimited.

For our most recent upcycling workshop, they wanted to make another stand, so this time we went for a double tier. There was a little more tinkering involved this time, as we needed to make sure the top layer was appropriately sized to ensure the bottom layer was fully functional and not hindered in any way by the top layer. Considerations also needed to be made regarding the height of both layers for aesthetics, functionality and balance. The size of the bottom support, the middle support and the top layer plate had to be just right.

I think their finished products were super neat! But you can see for yourself.

:) xx


Our Art Space

A while back, after we’d finished our set activity for the day, we had a few spare minutes up our sleeves for some free expression time. We also so had some paint left in the palettes and a very bare looking concrete pole – The solution was obvious!

When I told the children they could paint the pole, their first reaction was “Really!??!” What they did next was awesome.

As I stood back, observing them in action, what I saw was really heart warming and proof that a group of children with loaded paint brushes are in fact, perhaps contrary to popular belief, a very good mix!

They were patient with one another, said please and thank you as they shared their resources and their space. They encouraged each other, inspired each other with different ideas, collaborated and complimented each other on a job well done.

All I did was give them the paint, the brushes, the space and the freedom.

Pretty cool huh!?

:) xx