Uncategorized

IMG_0670

Wire Trees

Inspired by an image I saw on Pinterest, we made these really cool wire and bead trees. It was a little tricky to get the wire securely around the rock to form the roots of the tree, but we got there in the end. We also found that a fine wire is best because a) it’s easier to wind, b) beads with narrow openings can be thread more easily onto thinner wire and c) it’s easier to manipulate.

Have a look at our creations!

(Tracked back this source: http://www.dumpaday.com/genius-ideas-2/simple-ideas-that-are-borderline-crafty-35-pics-2/attachment/how-to-make-a-fake-tree-do-it-yourself-crafts/)

IMG_0533

Faces only a Mother could love

Happy Mother’s Day to all the Mothers raising amazing Artists and creative geniuses!

Today, our workshop was dedicated to making something special (and little bit cheeky) for our beautiful Mums. We talked about the expression “A face only a Mother could love” and then had a tonne of fun pulling funny faces until we found just the right one to draw. :) Here’s a look at what we got up to.


Funny faces: Oil pastels on paper.

With a little spare time before the end of the workshop, we also made some lovely, unique cards for our Mums. The creative juices were free flowing and some wonderful creations came to life, but what impressed me the most, were the beautiful, sincere and heartfelt words the children wrote about their Mums. Just gorgeous! xx

Thanks for another wonderful week Dabblers!

:) xx


Fields of Poppies

They shall grow not old, as we that are left grow old;
Age shall not weary them, nor the years condemn.
At the going down of the sun and in the morning
We will remember them.

Lest we forget.

This week, during our workshop, we took a little time to reflect on the up and coming ANZAC centenary and what this significant history means to our country and our community today.

We painted simple poppy fields with water colour and I encouraged each artist to include some meaning in their work. For most of them, the meaning came with the number of poppies they painted. Some painted one for each fallen soldier from within their extended family, while others painted one for every decade leading up to the centenary. We also explore the concept of closed/budding and open/blooming poppies and how we could incorporate this into the piece with significance.

Water colour can be quite a challenging medium, in that you need to ensure you have your brush loaded with just the right amount of paint, otherwise once on the paper, the paint can get away from you and run into parts of your picture you weren’t intending it to go. There’s also the ‘bleeding’ factor to contend with, as colours can tend to meld together, creating an entirely new colour. We do quite a bit of water colour work, so the children are well versed in this, but with this activity, some of them chose to paint the background first and then paint the poppies to see what effect they would get. One comment was that in some places, it looked like it was “Tye died”. Rad!

Beautifully thought out pieces.

:) xx

IMG_9575

Easter Lino Cuts


We finally did lino cuts! I’ve wanted to do them for soooo long, but I was always very weary because, you know…. Sharp implements + children = !!!!!

But something about Easter made me feel brave (maybe it was all the chocolate….?) and so, we went for it. We kept our designs simple as this was our first experience and our intention was to get a feel for the tools, the lino and the concept of positive and negative space and how this transfers into print.

We talked about how the print comes out as the reverse/opposite of what you carve and how that affects any text/words used. I did advise eveyone to keep their design to images only and they did. Except for one. There’s always one – and I LOVE that! Art is about pushing boundaries and though you might be given advice or feedback, ultimately, it’s your decision what you choose to do in YOUR creation and in my opinion, when it comes to art, you can never be wrong.

I was very thorough with my safety briefing, making sure each artist knew the correct way to handle the lino cut tools and to always, ALWAYS carve AWAY from themselves and to always, ALWAYS keep their supporting hand BEHIND the sharp lino cut tools.

Sadly, we did end up with a few scrapes and jabs. We finished the lesson 3 from 3, a 50% success rate (or failure rate, depending on whether you see the glass half full or half empty).

For our first attempt, I’m pretty chuffed!

:) xx

IMG_9563

Upside Down Upcycling

Upcycling: The process of using waste materials or otherwise obsolete items to create new functional items, saving landfill.

Upcycling is one of my all time favourite things. Ever! Even as a youngster, I was always creating new from old. My specialty was clothing. I used to spend all my weekends fossicking through Op-Shops, looking for little gems to take home and alter into amazing works or wearable art! It’s still a passion, but not something I get much time to indulge these days.

Last year I introduced this concept to the Dabble Art crew and they fell in love with it too. So much so that they begged for a repeat. In our first workshop, we made single tier cake stands from old dinner plates, teacups, mugs and glasses. The results were off the charts and the kids were thrilled with the idea that the uses for this cool creation were unlimited.

For our most recent upcycling workshop, they wanted to make another stand, so this time we went for a double tier. There was a little more tinkering involved this time, as we needed to make sure the top layer was appropriately sized to ensure the bottom layer was fully functional and not hindered in any way by the top layer. Considerations also needed to be made regarding the height of both layers for aesthetics, functionality and balance. The size of the bottom support, the middle support and the top layer plate had to be just right.

I think their finished products were super neat! But you can see for yourself.

:) xx


Our Art Space

A while back, after we’d finished our set activity for the day, we had a few spare minutes up our sleeves for some free expression time. We also so had some paint left in the palettes and a very bare looking concrete pole – The solution was obvious!

When I told the children they could paint the pole, their first reaction was “Really!??!” What they did next was awesome.

As I stood back, observing them in action, what I saw was really heart warming and proof that a group of children with loaded paint brushes are in fact, perhaps contrary to popular belief, a very good mix!

They were patient with one another, said please and thank you as they shared their resources and their space. They encouraged each other, inspired each other with different ideas, collaborated and complimented each other on a job well done.

All I did was give them the paint, the brushes, the space and the freedom.

Pretty cool huh!?

:) xx

Multicoloured Art Hands: To wash or not to wash?

I had a great question from a Dabble Art Mum last Monday.

“How do you get water paint off skin? Soap doesn’t seem to work.”

I usually wear my paint stained hands with pride, like some kind of metal of honour, not minding if others think it looks grubby, so I didn’t have an answer off the top of my head.  But, unlike my groovy little Dabblers, I don’t have to go school and present myself in a neat manner, so I got to thinking and tried out a bi-carb soda paste.

I mixed 2 tablespoons of bi-card soda and 1 tablespoon of water in a bowl to form a runny paste. I scrubbed my hands with the paste then added a few squirts of soap and scrubbed a little more before rinsing my hands off in water.

It didn’t magically remove ALL of the pigment (and it was the darker pigments that were harder to lift. The paste worked really well on lighter colours) but it did a pretty good job, better than just soap and water. Ordinarily, the colour comes off reasonably quickly (within 24 hours) with just soap and water, but the bi-carb paste can speed things up a little.

If anyone else has any cool (and safe) suggestions, we’d love to hear about them.

Character Art


Last week during workshops we talked about characters and the difference between a picture and a character, for example, the difference between a picture of a cat and a character that happens to be a cat. We looked at a few story books for examples and inspiration then developed our own simple character development guide that listed a few questions to think about while we were working:

  • What is its name?
  • What does it look like? Does it wear anything that is not typical?
  • What is special about it? Can it do something that is not typical?
  • What kind of mood is it in? What emotion/s is it expressing?

Illustrations often have great detail and can convey so much of a story on their own. If a viewer looks carefully, they can discover a lot about a character, even when there aren’t words!

When you look at these characters, what can you tell about them?


Story Stones

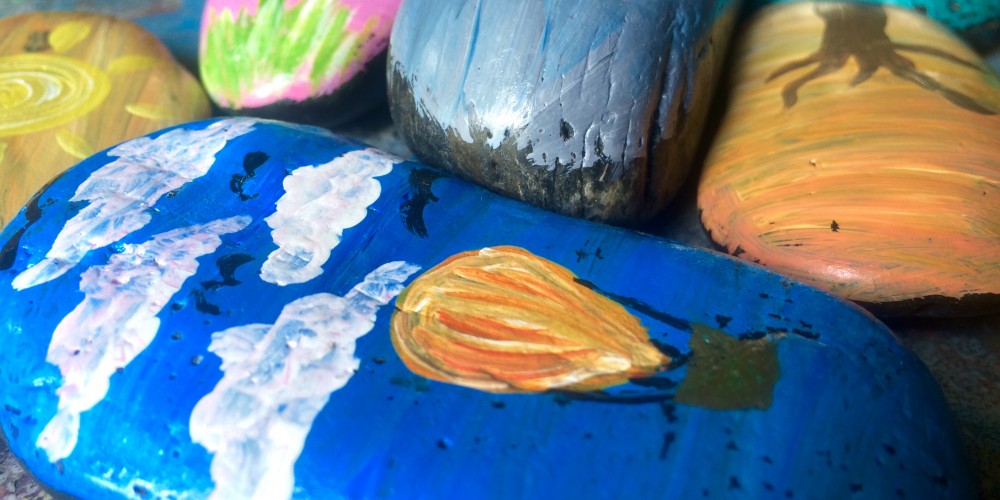
Have you ever heard of story stones? They’re really cool!

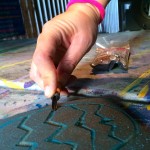
Story stones were the focus of this weeks workshops and were super easy to make. They are rather popular at the moment, among children (and adults!) of all ages because they are colourful, interactive and really fun to use. Originally, they were created for use as story starters and plot/character stimulus, however there are many, many other ways to use them and there is no right or wrong way, so you are only limited by your imagination.

To use them as actual story stones, all you need to do is have the story teller select a few stones at random and lay them out in any order they like. Then, starting with the first stone, the story teller begins to weave their magic as they improvise a story right there on the spot. Think of the wonderful, unexpected twists and turns that will take place as a wildly imaginative story unfolds! I can guarantee smiles for miles! (And probably a few giggles too!)

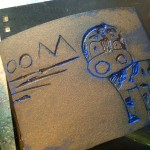
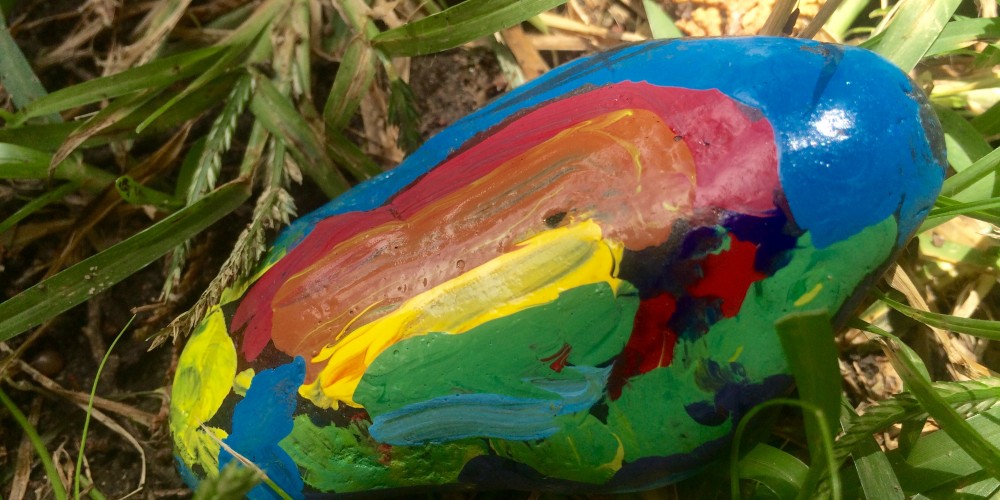
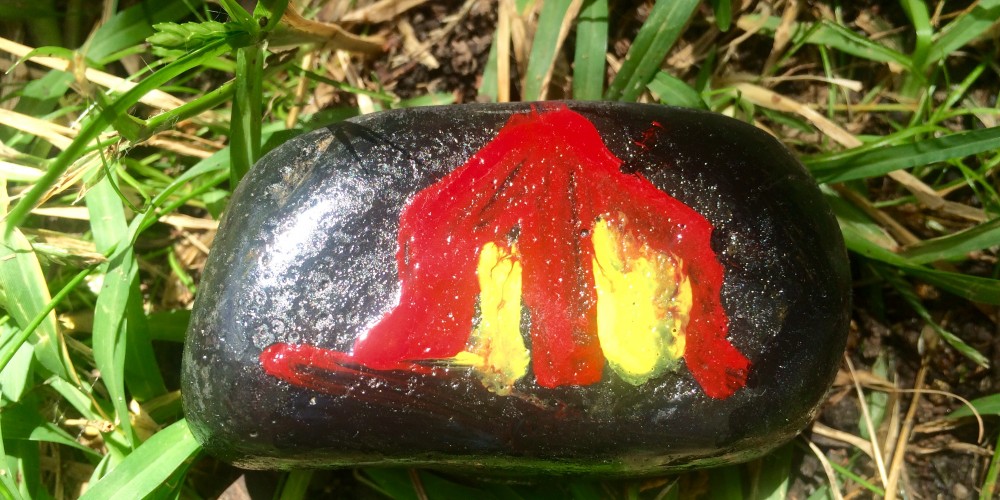
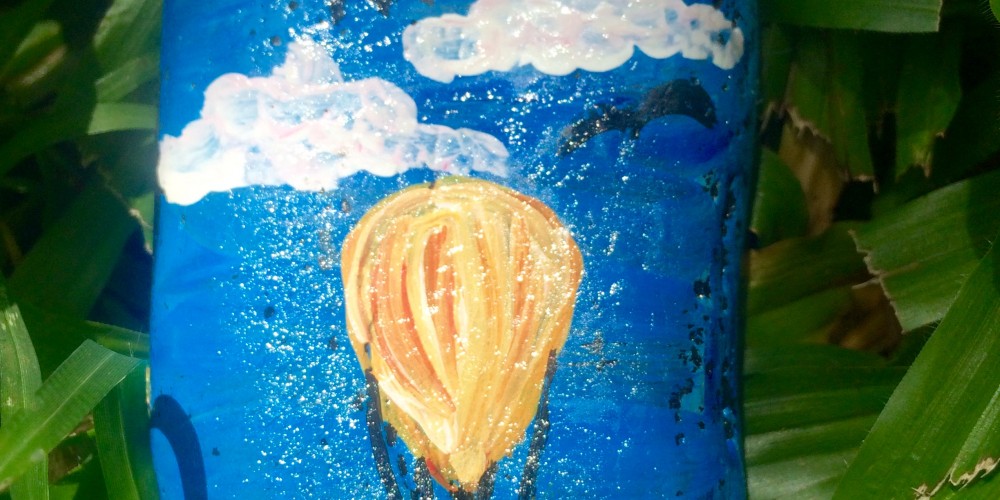
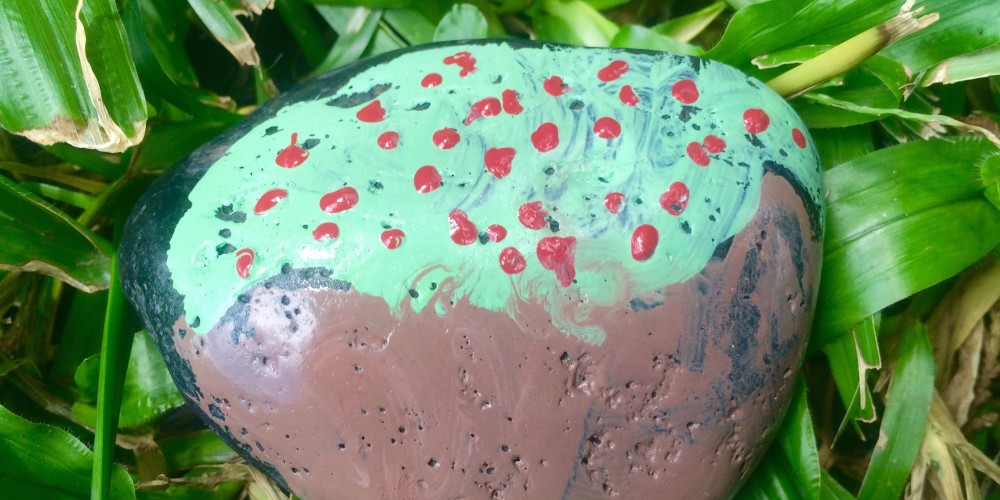
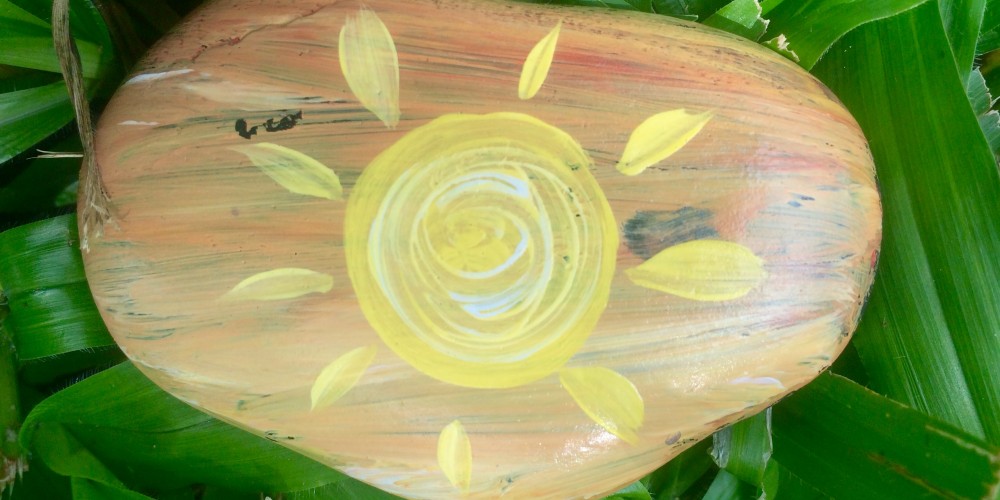
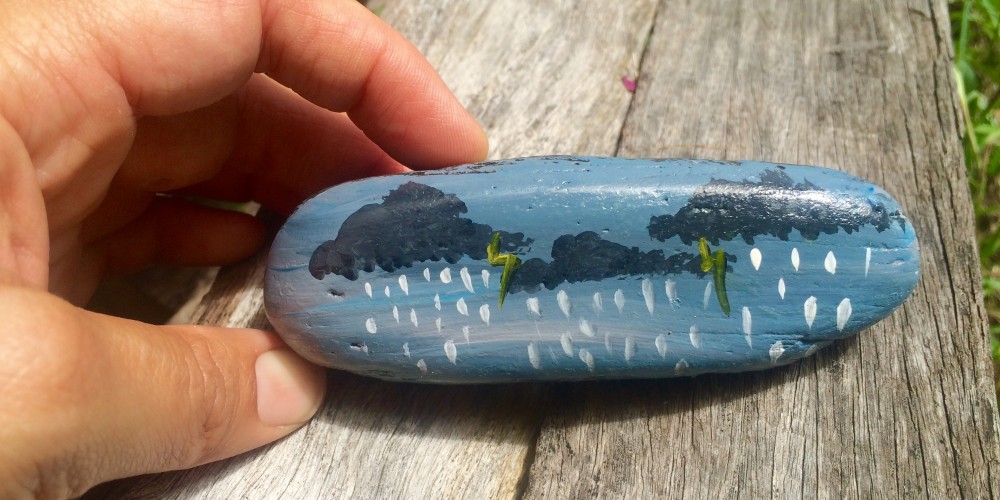
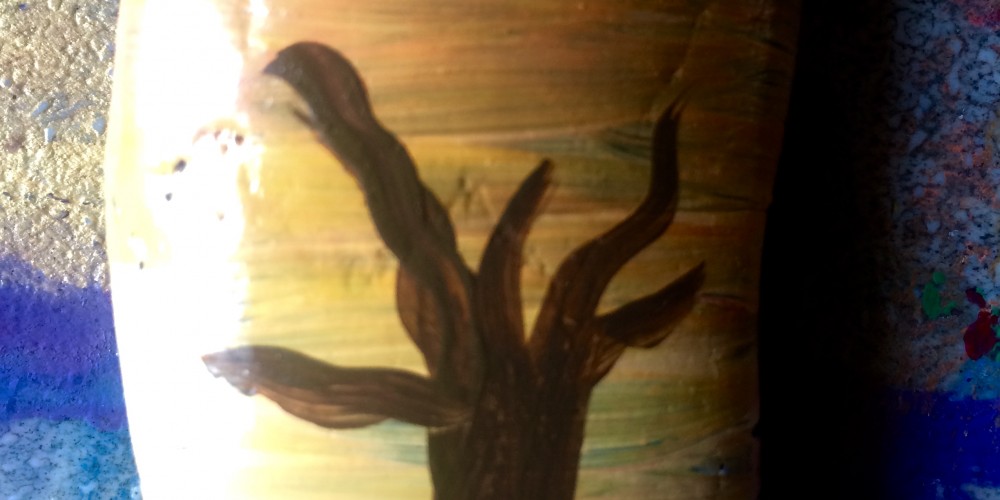
We used acrylic paint and creek stones to make ours, however the surface was quite shiny, therefore making it a little tricky here and there to get the paint to adhere. Once they were dry, I sprayed them all with a clear gloss enamel to help keep the paint in place and to preserve the painted images.

This is a really cool, simple little project that artists of all ages and abilities can take on confidently. If you do decide to make your own, can I recommend that  you:

  • a) Use rough creek stones
  • b) Use fine paint brushes and don’t overload the brush with too much paint at once. Since the surface you are painting on is so small, fine paint brushes are best to use and will allow you to add fine details.
  • c) If you end up using darker stones like we did, it’s a good idea to paint in a background first, allow it to dry and then paint your image over the top. We found that without a background, some of our images were getting lost in the natural darkness of the stone.

Here are a couple of links to explore if you wish.

Story Stones

Story Stone Ideas and Uses


Have fun!

Renée :) xx

cropped-dabbleart.png

I love to Dabble. You love to Dabble. We all love to Dabble!

This year, Dabble Art turns 4! In celebration of this mini milestone, I am excited to present to you my brand new website. It is my intention to blog about our weekly Dabble Art adventures, which will not only allow me to share more of what we do and keep parents and caregivers informed, and but also serve as a nice little extra keep sake (on top of all their precious Dabble Art creations of course!) for all of us to look back on and reflect. This space will evolve with Dabble Art and therefore content additions and updates will reflect this growth and change.

I’d like to thank all my fantastic, dedicated students who make Dabble Art a really special place and also their parents and caregivers for their continued and always positive support. I just love you all – Thanks a million! xx